Essential Gear for Voice Over
If you’re just starting out and trying to find your way into voice over, knowing the what, where, why, and how of all the gear you’ll need to get started can be overwhelming. I know it was for me. And nowadays—particularly due to the Covid-19 Pandemic—voiceover has very much become a work from home job. This means having a solid home recording setup has become more or less an expectation for working voice talent.
So to get you on your way and booking gigs as quickly as possible, let’s talk about all of the gear you’ll need for your home recording studio.
Neumann is a highly regarded microphone company.
MICROPHONES

Neumann is a renowned microphone company, and is often held up as an industry standard.
No shocker here, but a microphone is pretty important to your recording setup. But what’s the BEST mic for voice over? Well, while there are lots of different types, brands, and styles of microphones—it’s important to say that it truly is the performer behind the mic that matters most. So when considering a mic as voice actors, we’re really looking for the tool that will best and most honestly capture our performance.
With that In mind if I were going to choose ONE mic for my studio that I could use for everything—audiobooks, animation, commercials, videogames—I’m looking for what’s called a Large Diaphragm Condenser Microphone. It’ll look something like this.
Some recommendations:
Rode NT1, my first mic ($229 Mic only, ~$399 Bundle — B&H, Sweetwater)
Audiotechnica AT-2020 (~$99 Mic only, $230 Bundle — B&H, Sweetwater)
USB Mics
I’m often asked by new voice artists about USB microphones. They’re cheaper, easier…why not?

The Blue Yeti is one of the most popular USB microphones on the market.
Well, like I said earlier, it’s basically prerequisite that you have a solid home recording setup where you can provide high quality recordings for the client’s who are booking you. So while USB mics are decent beginner options to get your feet wet, chances are you’ll need to upgrade at some point soon. So in my opinion by investing a little bit more upfront in a proper professional setup, you’re not only saving yourself some cash in the long run, but you’re putting yourself in a position right away to work with more paying clients—which is great.
MICROPHONE ACCESSORIES
To make your fancy schmancy mic work for you, here are the essential accessories.
A Mic Stand. Before you buy, think about where you’ll be recording. Will you be standing or sitting mostly? How much desk or floor space for the stand do you have? Would a desk mounted boom arm be better for you?
A Shock Mount. This attaches your mic to the stand, and prevents some vibrations from ruining your recordings.
A Pop Filter. To filter the puffs of air from your speech before they hit your mic and ruin your recordings. Make sure it’ll fit your mic stand situation.
AUDIO INTERFACE
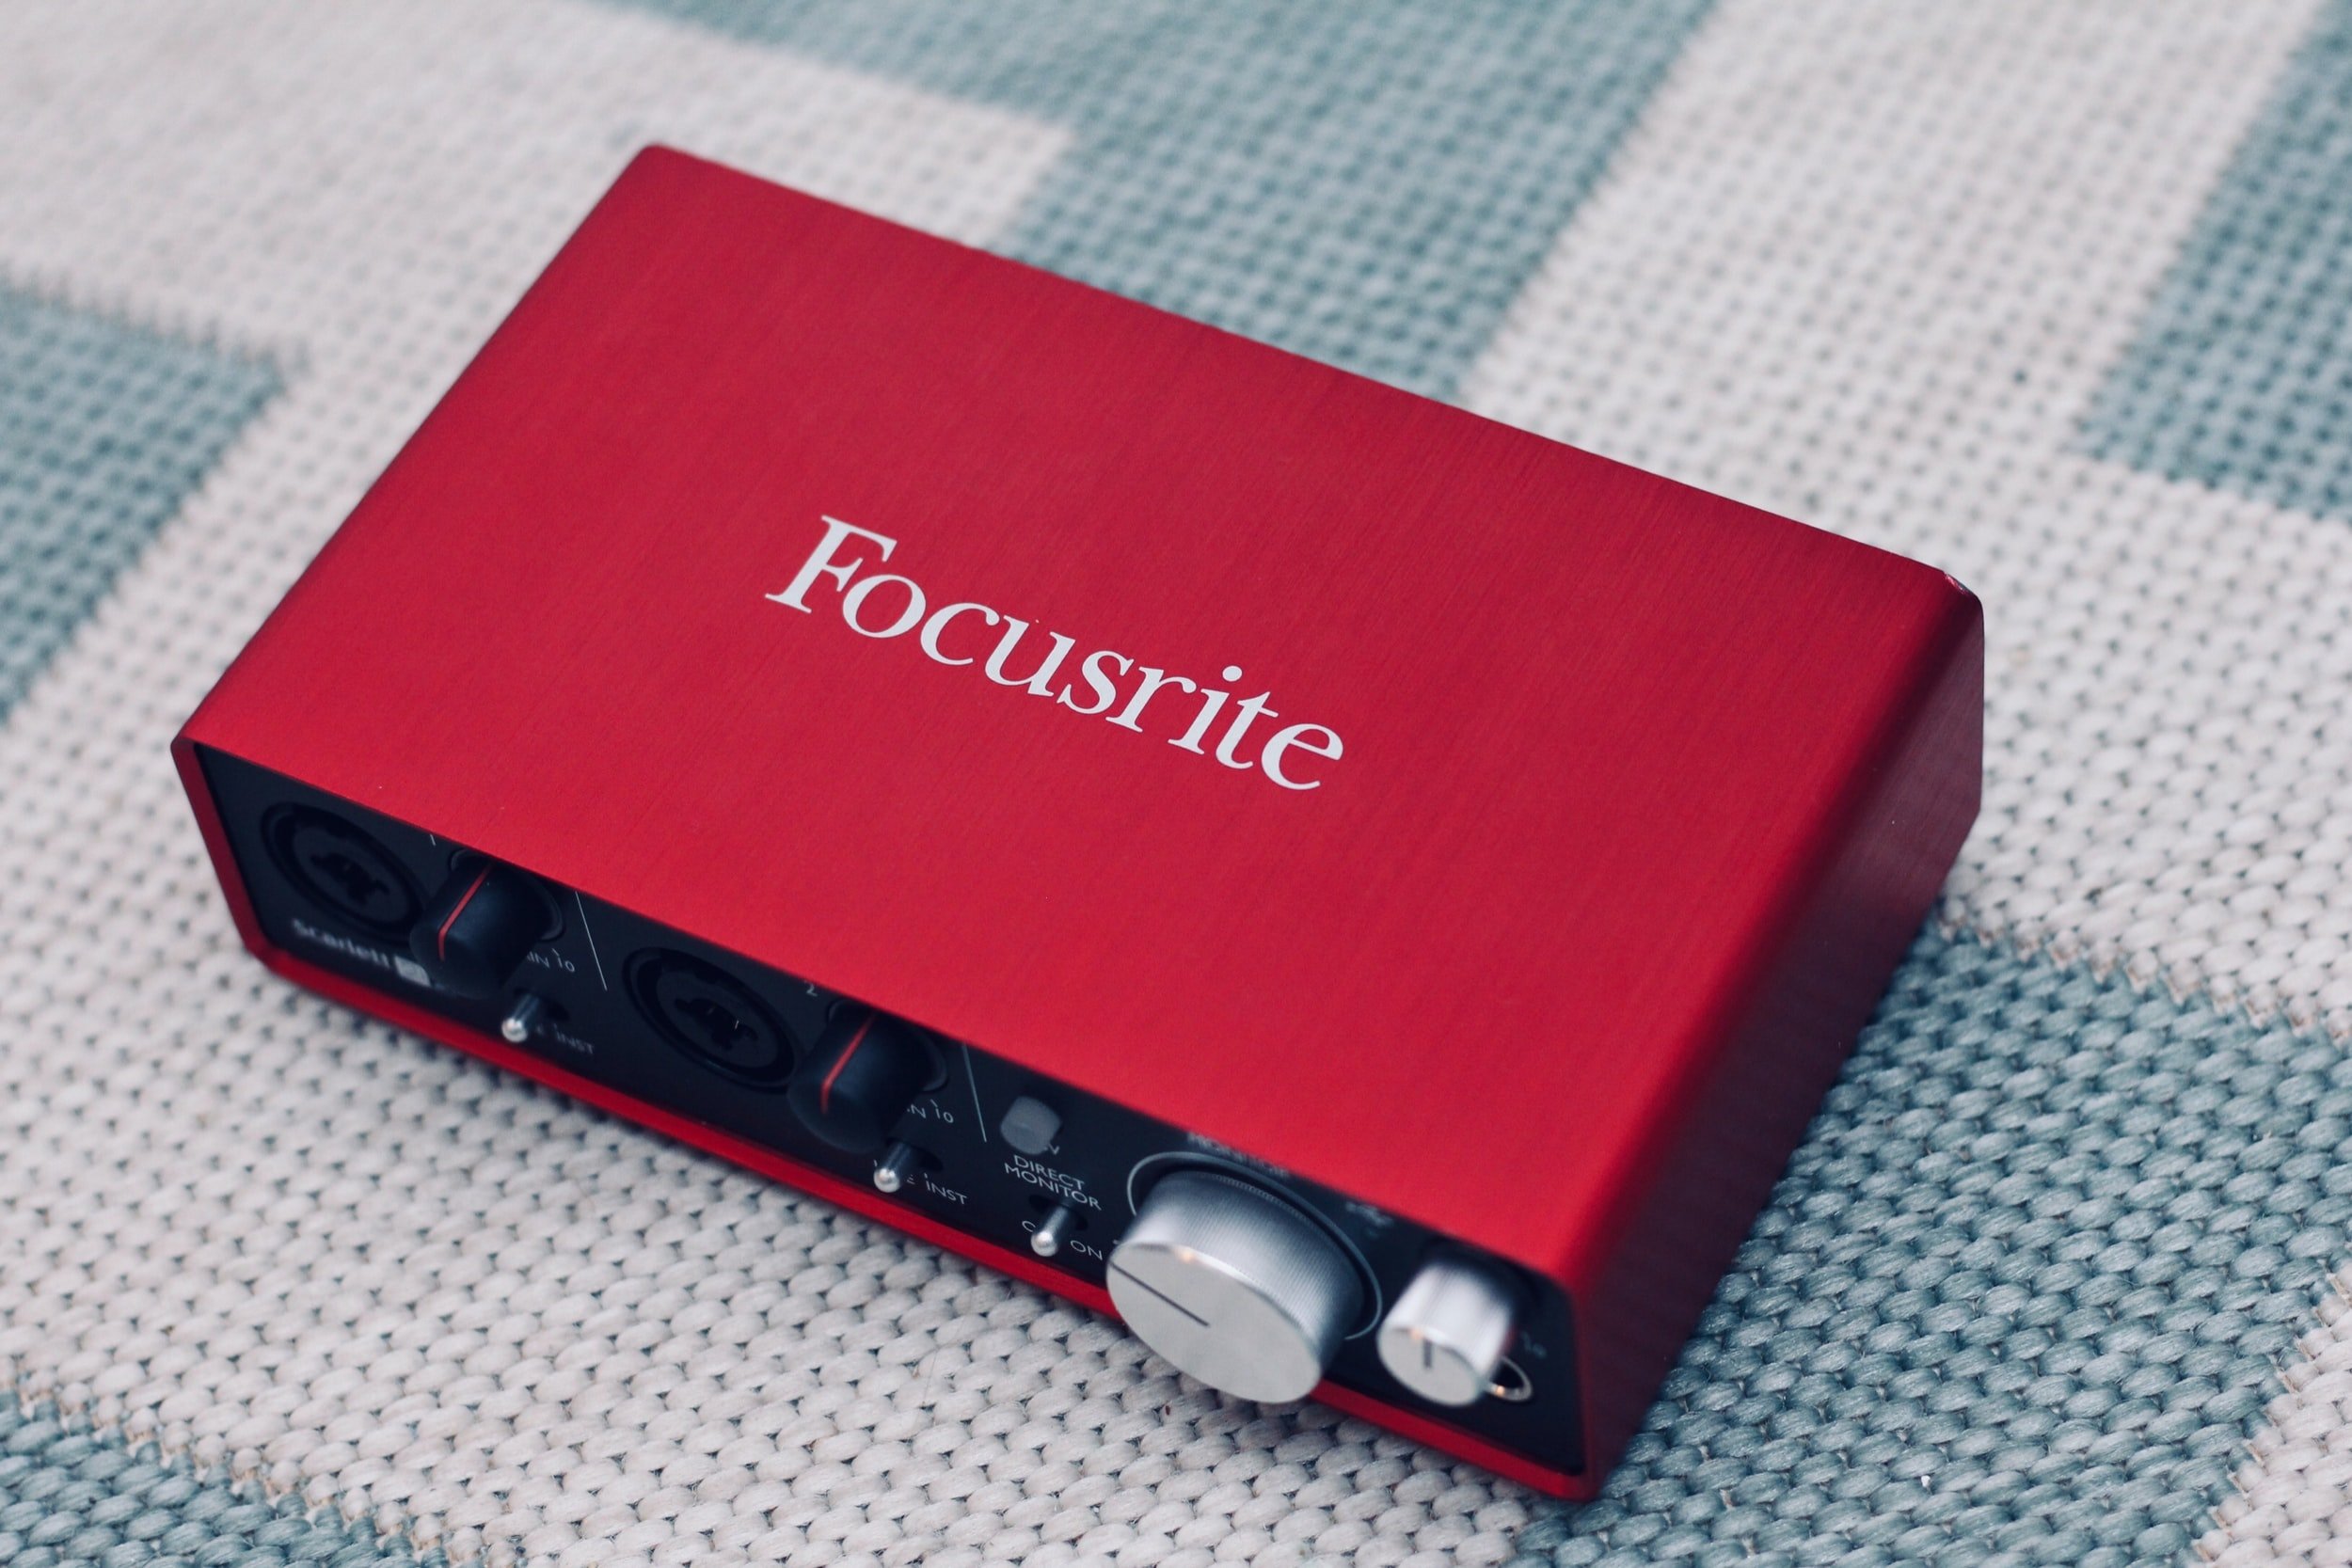
The Focusrite Scarlett interfaces are probably the most popular on the market. The Solo was my first interface and what I typically recommend to new voice talent.
After you pick yourself up one of these little boxes, it will last you your whole career more or less.
What do they do?
They connect your microphone to your computer and essentially translate what your mic “hears” into something your computer can understand—One’s and Zeroes.
They also control the Gain of your microphone, or how sensitive it is; allowing you to make sure you're getting good recording levels whether you’re whispering or screaming your head off.
They let you plug in some fancy headphones.
Lastly, they provide your microphone power if it needs it (which all condenser microphones will)
To connect your mic and your audio interface you’ll need an XLR cable.
My recommendations:
Focusrite Scarlett 2i2 ($169 B&H, Sweetwater)
Focusrite Scarlett Solo, my first interface ($119 B&H, Sweetwater)
PreSonus Audiobox USB 96 ($99 B&H, Sweetwater)
HEADPHONES

Audio-Technica makes great headphones for a range of budgets.
These are important for a few reasons, not least of being that they are the piece of equipment that is physically touching you for hours at a time. Meaning it’s really important that they are comfortable for you to wear. They may need to break in a bit, but if they cause you discomfort—try another pair!!
They are also important because they let you hear or monitor what your microphone is recording. How’s you’re performance? Is there a dog or airplane in the background? Is your tracksuit rustling and ruining your recording?
My recommendations:
Audio-Technica AT-20, 30, 40, or 50 ($50-$150 — Whatever fits your budget)
Sony MDR-7506 ($99 — B&H, Sweetwater)
Beyerdynamic 770 Pro, 80 ohm ($159 — Sweetwater, what I use)
COMPUTER
To run the show, you’re going to need a computer. If you’ve already got one….you’re all set. But if you’re in the market for a new one or for an upgrade, here are some things to consider.
Fan noise…If your computer does it’s best Boeing-737 impression as soon as you boot it up, that’s going to be a problem in the booth.
Storage….Audio files take up space. If you’ve got a computer is limited, it may be worth padding that out so you don’t have to worry about file management constantly. You can do this by:
Upgrading your computer’s internal storage (if possible)
Getting an External HD (look for a “solid state hard drive” or SSD if you can, they’re silent and won’t disrupt recordings)
Investing in Cloud storage (excellent for archiving, backup, and delivering recordings to clients—I use Dropbox as well as Backblaze and can’t recommend them enough.)
Processing Speed…if you’re upgrading your computer…why not make it fast? Not a make or break thing, but it can be a pain to wait for audio to render.
AUDIO EDITING SOFTWARE -OR- D.A.W.

Different software feels different to use. Try a couple out and see which is the most intuitive for you to pick up.
Where the magic happens.
There are three different “tiers” I’d recommend:
FREE
Audacity and Garageband are two fantastic and free options. They offer all the functionality you’ll need—record, stop, and minor editing capabilities. Audacity has a bit more control if you’re into that, but both are great and more importantly—FREE.
Trial or Entry Level Versions
Alternatively, when you buy your audio interface, many come with trial versions or stripped down versions of professional software. (ProTools First, Ableton Lite, etc.) Give them a try! They are great to dip your toes into more of the production side of things, offer a few more tools than the other free options, and can help you get a leg up if you decide to graduate to professional software down the line.
Speaking of…
Professional Digital Audio Workstations (D.A.W.)
Pro software is beautiful, detailed, deep, and….expensive. Either purchasing a lifetime license or an annual subscription, these run from $400 a year to $1200 for a full license. Pricey to say the least….but not necessarily. I personally use REAPER, a fully loaded pro software that costs….wait for it….$65 for a lifetime license until you make over $20k/year using it. Then they ask $225. It’s brilliant, generously developed and funded, and I love it.
My recommendations:
Audacity — FREE, Awesome (Download it here)
Garage Band — FREE, Great (Pre-installed on Mac OS)
REAPER — $65, Unbelievable (Download Reaper)
Wrapping up…
The gear you’ll need:
Microphone (probably a Large Diaphragm Condenser Mic)
Mic Stand or Broadcasting Arm
Shockmount
Pop Filter
Audio Interface
XLR Cable
Closed Back Headphones
Computer
Audio Editing Software
For all the gear listed here, you can shop around for everything separately, or (what I would recommend) visit B&H or Sweetwater, tell them your budget and maybe a little bit about yourself and your goals in case it’s helpful—then think about going with one of their bundles. Unless your setup will require specific items that don’t come in the bundle, that might save you a bit instead of buying everything separately.
As with any of the advice I offer, it’s all based on my experience and knowledge which is limited! You know yourself, your budget, and needs better than I ever will—so take whatever helps, then do what’s best for you.
Shop around! shop used, refurbished, or demos. Look for sales or student discounts. Take advantage of return policies if you’re not sure. Don’t be afraid to ask questions!! Ask the folks at B&H or Sweetwater questions! Their customer service teams are world class. Ask ME questions! I’ll get back to you as soon as I can.
In the next one I’ll cover where you might want to set up your booth, how to go about it, and why.
See ya then.
Further Reading: